 Copper Pipes are widely used in a lot of homes and facilities. They have good pressure ratings, good temperature resistance and are typically quite long lasting. Of course, like all pipes, they can develop leaks.
In this post, I’m going to talk about how you can fix a leaking copper pipe yourself, without the need for a plumber or soldering.
The process is simple and one which almost anyone (with the right tools and products) will be able to complete. The one caveat is, you’re going to need access to the leaking part of the pipe and the ability to turn the water off. If you can tick both of those boxes, read on.
Pinhole Water Leaks
Whether it’s in the kitchen, around your water heater or in your bathroom, a leaking copper pipe can be a real problem. Not only is it wasting water, a small leak has a way of turning into a bigger leak over time. Needless to say, it’s something you want to get fixed.
The obvious step; call a plumber. Depending on the exact situation, this could be the right play. They’re professionals and are trained in how to find and fix different kinds of leaks.
Sometimes, though, this is simply not a realistic option. Whether it’s because of cost (they’re a bit expensive, especially on weekends), availability (do they ever show up on time?) or sheer bloody-mindedness (you just like to fix things yourself), plumbers aren’t always the best choice.
The rest of this post talks about how you can quickly and easily repair a pinhole leak on a copper water pipe yourself using a special type of epoxy putty. We’ll walk you through the steps involved one by one.
Step 1: Find the Leak.
Depending on the type of leak you’re fixing, this could be simple or a little complicated. For fast moving leaks, it’ll be obvious. For a slow water leak (especially on a vertical pipe) it can be a little trickier to find the exact spot.
For these, dry the area you suspect the leak is. Then, place a paper towel around the pipe. Remove the paper towel and inspect it for wet spots. Repeat this process until you’ve found (and marked) all the leaks.
Step 2: Turn off the Water.
Now you’ve found the leaks, it’s time to fix them. The first thing to do is turn off the mains water. Once you’ve done this it’s a good idea to also turn on any taps in the area to release pressure from the pipes.
Step 3: Prepare the Pipes.
Grab a bit of sanding paper (about 100 grit will be best) and give the area around the pipe leak a light sanding. Made sure you work your way all around the pipe at the leak point as you’ll be applying the putty to this whole area later.
This sanding is important as it significantly increases the amount of surface area the epoxy will have to bond with. Greater surface area = greater adhesion. Skipping this step will result in a fix that has less pressure resistance and a greater chance of failure.
Step 4: Clean and Dry the Pipe.
Now you’ve sanded around the leak, clean the area up. Our Surface Cleaner Spray would be ideal for this as it evaporates away without leaving residues. If you don’t have that available, water will do in a pinch. Just make sure you remove any and all dirt, dust or grime.
Once it’s clean, give it a good dry. You want the pipe to be shiny by the end. Any dirt leftover will get in the way of the epoxy reaching the pipe and weaken your patch. It’s for this reason we don’t suggest too many other cleaners as they can leave residues behind that will interfere with the putty.
If you simply can’t dry the area off completely there is another option; our Aqua Repair Stick Epoxy. It’ll stick well to wet surfaces and sets very hard. We prefer Copper Repair Stick for this job but if you simply can’t get the area dry, Aqua Repair Stick is a great fall-back option.
 Step 5: Prepare the Epoxy Repair Putty
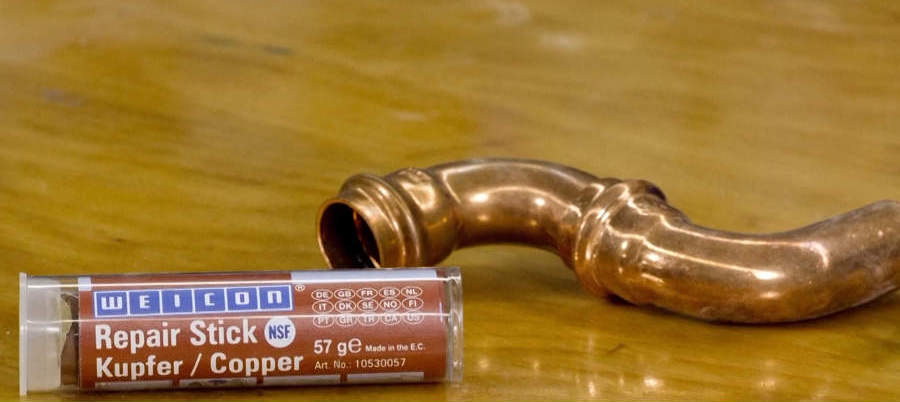
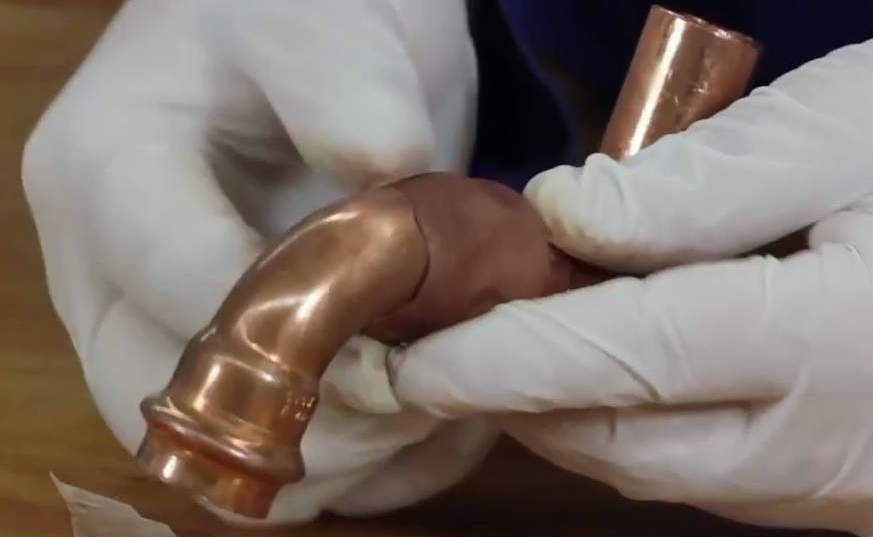
For the following steps, we’ll be using our Copper Repair Stick Putty. Made in Germany, this epoxy consists of epoxy resin with copper fillers. It bonds very well to copper, will set hard, is coloured the same as copper and works fast. It’s also very easy to use as you’ll see below:
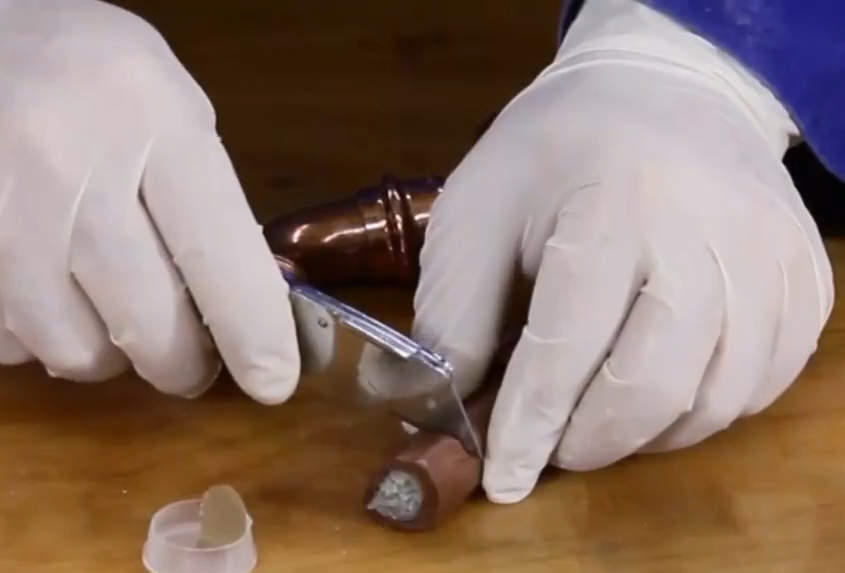
Throw on a pair for gloves and open the tube. Using the back end of a Stanley Knife (or any other blade-like object really) slice off a small portion of the putty. Remove the plastic liner on the outside of the cut portion of putty.
You only want to slice off enough to wrap around the pipe and cover an area about 25mm (1 inch) either side of the leak. This is one of those times you’re better off cutting slightly less than you need as you can always add more later if you underestimate.
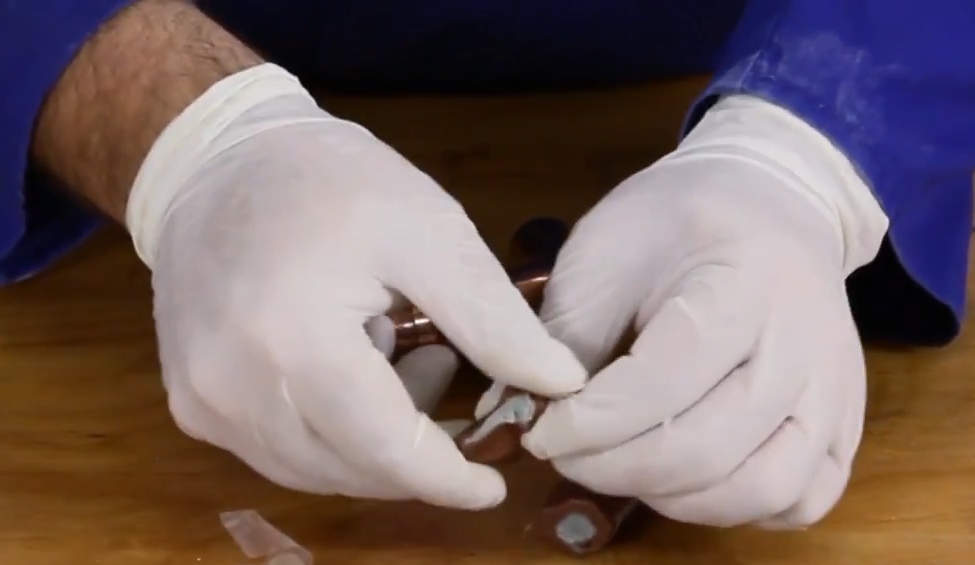 Step 6: Mix the Putty
Now you’ve got the amount you want to start with, knead it together in your hands until it takes on a single copper-brown colour. You may feel the putty start to warm as you knead it, that’s normal and a sign that the epoxy is starting to work. As soon as you have formed it into a single, copper-coloured mass, move onto step 7.
Step 7: Apply the Putty.
Press the copper repair putty down onto the leak and shape it around the circumference of the pipe. I like to start with the pinhole leak, press the putty there, shape around the pipe and taper down the edges.
 Try to cover an area about 25mm out from the leak point in both directions. If the leak is in a fitting, cover the entire fitting with putty.
It is very important to get this done as quickly as possible. Copper Repair Stick works fast and has a pot life of just 3 minutes. That means that 3 minutes after you’ve mixed it, it will start to cure. At that point, you really want to have it in place.
This is the reason I said earlier about mixing only enough (or even slightly less) than you need. If you’ve underestimated, don’t worry, just cut off more putty, mix it, and apply. Focus on the leak and surrounding the pipe first, use the extra putty to increase the coverage area on either side.
The video below shows steps 5, 6 & 7.
 Step 8: Let the Repair Putty Dry.
One of the reasons we like Copper Repair Stick for this job is that it sets fast (others include bond strength to copper, appearance and potable water approval, more on those later). Now that you’ve applied it around the leak, it’s time to wait a little bit.
The exact amount of time depends a little on things, like, how much you used and the temperature you’re working in, but we really suggest at least an hour. After about 10 minutes, the putty will be around 35% cured. After an hour, it’ll have reached about 50% of its final strength. We call this mechanical strength and it’s about the minimum amount of time you want to give it before switching the water back on.
Full cure will take 24 hours but going that long without water is probably not practical. At 50% cure, Copper Repair Stick will have stuck itself to the pipe and set hard enough to prevent the leak. It’ll just continue to get harder from there.
Step 9: Turn the Water Back On.
After an hour (at minimum) of waiting for the putty to cure, it’s time to turn the water back on. Once this is done, check to make sure there are no leaks by repeating step 1.
That’s it.
 Why we like Copper Repair Stick for Fixing Copper Pipes.
Throughout this post, I’ve spoken about how to use this epoxy repair putty for fixing copper pipes. Before finishing, I want to quickly mention why I like this solution.
It really boils down to a combination of reasons. Namely;
Copper Repair Stick Sets Fast.
Very important for a job that has you turning off your mains water. Waiting an hour for it to set; probably going to be ok. Waiting 12 hours, that might be asking a bit much.
It Bonds Very Well to Copper.
Copper Repair Stick has been designed to stick to copper. It’s made from a specially formulated copper filled epoxy resin basis and has very high adhesive strength. This matters because without it, the pressure from the leak could be greater than the bond strength and the repair putty could be dislodged.
Weicon Copper Repair Stick is NSF Approved for Drinking Water Applications.
This putty is going to stop the leak by being pushed into the hole. That means at least a small portion will be in contact with the water running through the copper pipe. If that pipe is carrying mains water, you’ve got a situation where the putty will be interacting with some of the water you drink.
For that reason alone, I find it very comforting to know that Weicon Copper Repair Stick has been certified to NSF/ANSI Standard 61 as suitable for use in drinking water systems. I see very little point in fixing a pipe only to pollute anything that travels through it.
Hardened Copper Repair Stick is Copper in Colour.
This one reflects my lack of sculpting skills I guess. Personally, I’d prefer for my patch to blend in with the rest of the pipe. If you’re patching a pipe leak under your sink or in some other hidden area, this probably doesn’t matter too much. But if you’re like me and have some visible copper pipes running along walls or ceilings, not drawing attention to a fix could be a benefit.
You can find more information on our copper epoxy putty repair stick here. There you’ll find links to a comprehensive technical data sheet, additional tech specs and more.
I really hope you’ve found the post useful. If you do have questions I haven’t answered here, or have additional tips that could help your fellow readers, please either contact us or let us know in the comments. Our great team will be happy to assist in any way we can.