If you’re reading this post, chances are you already know the problem. The material used to make kite bladders is incredibly hard to bond well. Some glues will stick a little, but to ensure a strong, stable and lasting bond that can handle the stress put on it; you need something a little more industrial.
We’ve had a few customers approach us for help with this particular application, so we decided to put together this short post with our best advice. In it, we’ll explain why the valves on kite bladders are so hard to reattach properly, why we suggest our RK-7300 acrylic glue for the job, and how to use it.
Repairing the bladder valve instead of buying a new one.
As far as we know, many kite bladders are made of TPU (an thermoplastic elastomer based on urethane). This has great flexibility but, it has a very low surface energy. This can cause issues for many types of glues that rely on good surface energy to activate the chemical reaction that results in a strong bond.A punctured valve is obviously a problem. The stress put on it over years of use can cause issues with the adhesive originally used. Unfortunately, the materials used for kite bladders make the repair a little tricky.

Why we suggest RK-7300 Adhesive for this.
Our Easy-Mix RK-7300 is part of our Structural Acrylic Adhesives range. This particular style has been engineered specifically for bonding low surface energy materials (like TPU but also PE, PP and even PTFE).
As a structural glue, it is used when you need a very high strength bond. It’s also quite thick and pasty which makes it easy to apply easily without running off.
Finally, it has excellent shear strength and is able to handle the dynamic loads this valve will be subjected to during use meaning that the repair will last and you won’t be doing this all over again in the near future.
Steps for Reattaching a delaminated kite bladder valve.
Our RK-7300 is pretty easy to use thanks to the Easy-Mix Dosing System. That said, there’s a few steps you should take to ensure a good bond and seal between bladder and valve.
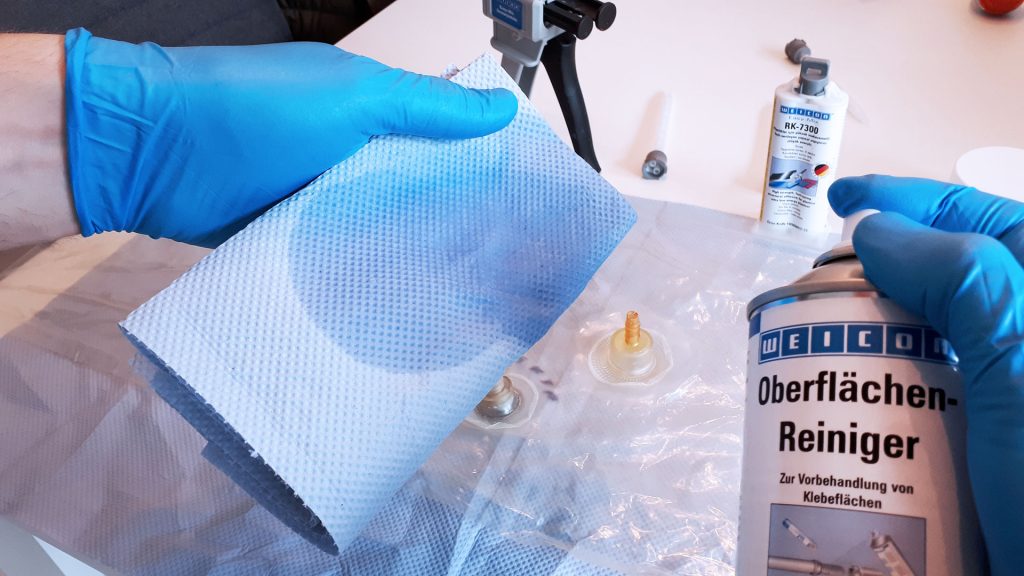
Step 1: Cleaning.
The first step in the process is a good cleaning of the area being bonded. Remove any sand or dirt and then give the area you will be bonding a good, thorough clean with an evaporating cleaner that won’t leave behind any residues (Surface Cleaner is ideal for this).
Ensure you have cleaned away any sand or dirt too. This glue is going to stick to whatever it comes into contact with and if that’s something other than what you intend, that’s a potential leak point for the repaired valve in the future.
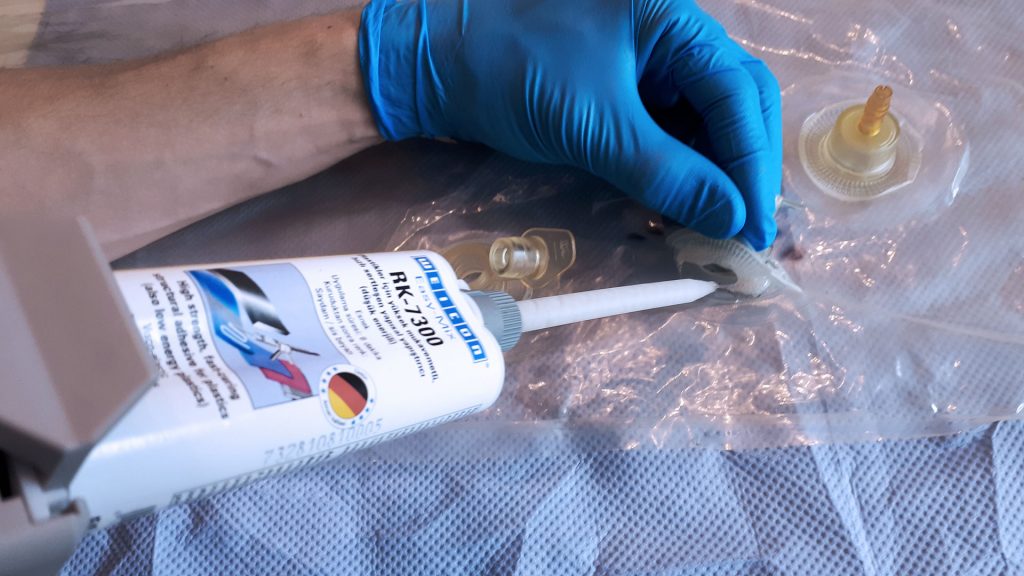 Step 2: Bonding.
The next step is applying the glue itself and securing the valve. Since we haven’t actually done this ourselves, we’ll use the description of the process given by someone who has over in the Netherlands:
“After cleaning, the Easy-Mix RK-7300 was used. First, I put the included mixing nozzle on the cartridge. The RK-7300 is a two-component adhesive, which only turns into a workable compound as it’s mixed while travelling through the special helix mixing nozzle (one is included with each tube).
As soon as the adhesive had been applied to the tube material, I fixed the valve by applying gentle pressure. I covered it with a small glass, so it wouldn’t accidentally move. Then, I allowed the adhesive to cure overnight.
Other people have also suggested applying a little weight to the bond. As long as it’s well placed this probably isn’t necessary in most cases. That said, it won’t hurt as long as it doesn’t force the adhesive out or move in any way while the glue is still curing.
 Step 3: Cure Time.
Typical curing times for RK-7300 Acrylic Glue are measured in a few different stages. We suggest leaving the glue for a full 24 hours if possible. It’s probably going to be ok after achieving mechanical strength but unless there’s a real rush, we don’t see much point in taking the risk.
Timelines to be aware of for this adhesive are:
Pot Life: 8 Minutes. This is the amount of time you have to work with any mixed portion of the glue before curing will begin.
Handling Strength (about 35% of final): 60 Minutes.
Mechanical Strength (50% of final): 8 Hours.
Fully Cured (100%): 24 Hours.
Questions or Need More Info?
If you’re looking for more information on our RK-7300 Acrylic Glue, we definitely suggest having a look at it’s dedicated product page. There’s a lot more technical specifics and information on what this high strength glue is able to handle provided there.
For more information on how to use the glue, we also suggest consulting our RK-7300 Technical Data Sheet and Safety Data Sheets both of which are available via the aforementioned product page.
One question you might have base on the photos is do you need the D50 Dispenser for this glue? The answer is sort of. You don’t necessarily need this particular one as we have seen other brand dispensers do the job (we can’t guarantee all of course).
You will need a form of dispenser though to ensure that the two adhesive and activator are dispensed in the correct ratio.
If you do have any other questions or need help with adhesives for other tricky substrates and applications, please do reach out to us. We’ll do what we can to help.